Title here
Summary here
July 28, 20224 minutes
안녕하세요?
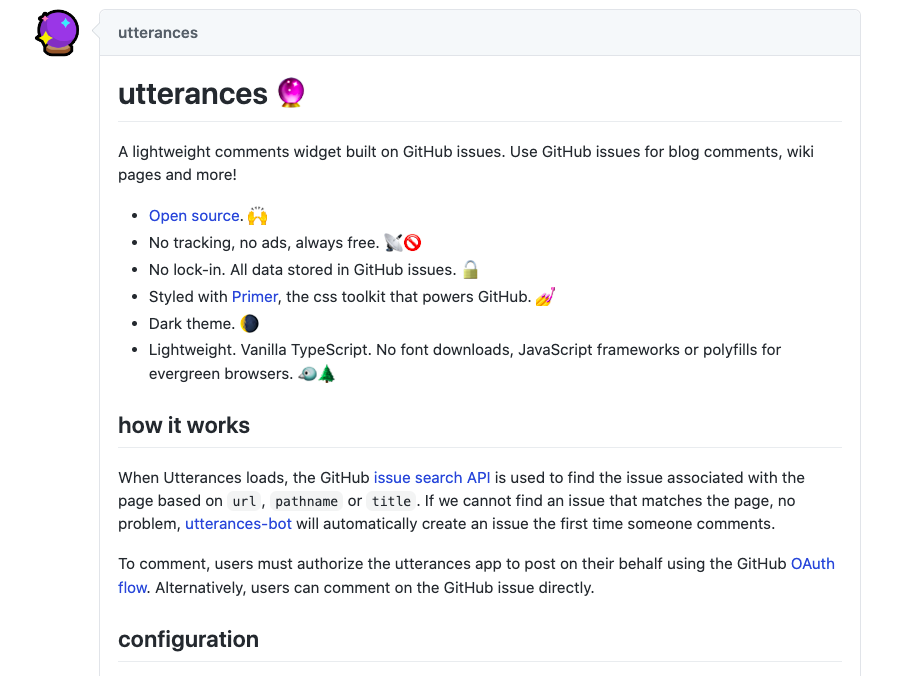
Disqus 댓글 창이 자바스크립트 로딩 양이 엄청 많다는 해외 글을 보고 좀 더 가벼운 게 없을까 구글링 하던 도중 예전에 한번 봤었던 Utterances 댓글 창을 살펴보게 되었습니다.
Utterances 댓글 시스템은 Github 리포의 Issues 시스템을 이용한 건데요.
Utterances Bot이 자동으로 현재 사이트의 주소나 타이틀 이름을 이용해서 해당 Issues를 만들고 그 밑에 댓글 창을 달 수 있게 해주는 겁니다.
Github 리포지터리를 이용하기 때문에 추가적인 댓글 DB 호스팅 비용이 들지 않는 무료인 거죠.
일단 세팅하는 방법은 아래 그림과 같습니다.
역시나 자바스크립트 코드를 삽입하는 건데요.
React 애플리케이션에서 이렇게 자바스크립트를 직접 삽입해서 이용하는 방법을 알아보도록 하겠습니다.
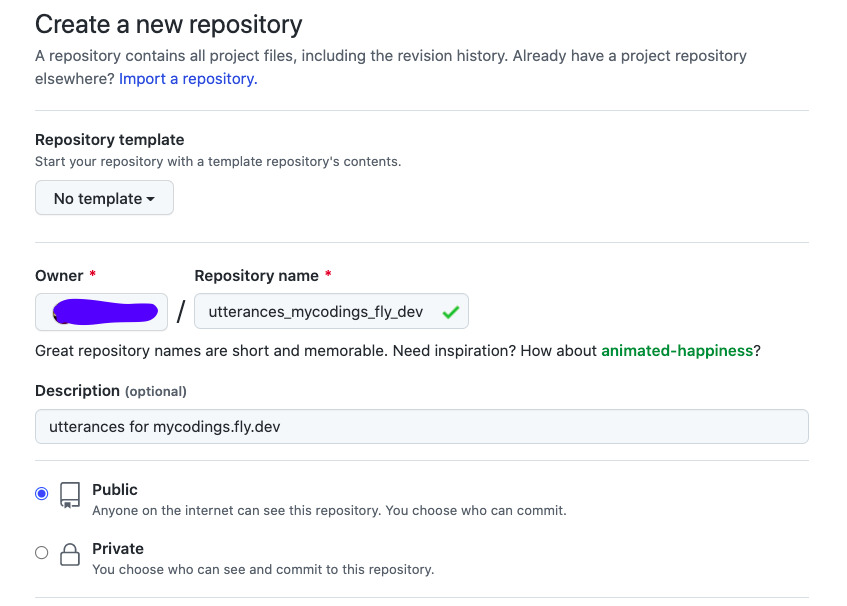
먼저, 위 그림에서 볼 수 있듯이 우리가 필요한 게 Github Repo인데요.
Github에서 Public 상태의 자신의 블로그 전용 Utterances 댓글 리포를 만들도록 하겠습니다.
위 그림처럼 Github Repo를 꼭 Public으로 만들기 바랍니다.
그리고 Github Repo를 Utterances가 편집할 수 있게 해줘야 하는데요.
utterances-bot이 자동으로 그 역할을 할 겁니다.
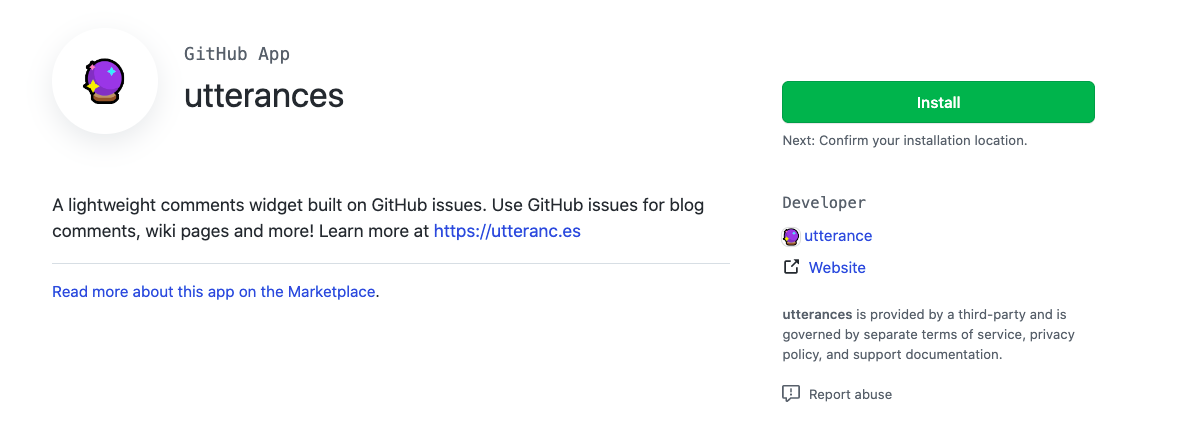
utterances-bot은 Github Repo에 utterance-app이 설치가 되어 있어야 작동하는데요.
우리가 위에서 만든 Github 리포에 utterances-app을 설치해 봅시다.
아래 링크를 클릭하면 됩니다.
여기서 오른쪽에 Install 버튼을 누릅니다.
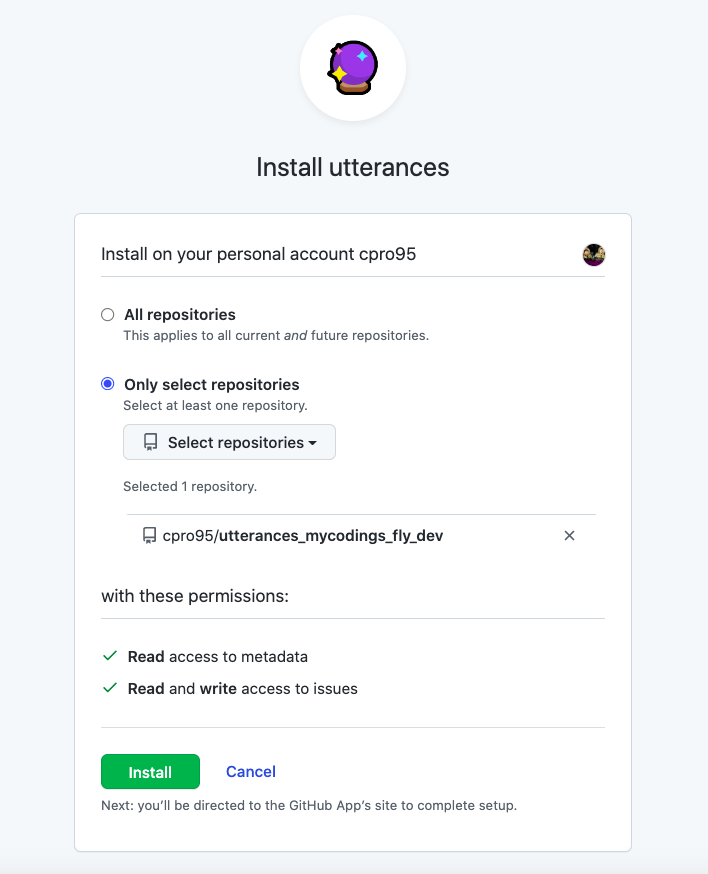
그러면 아래와 같이 utterances-app을 설치할 Github Repo를 선택하라고 하는데요.
위 그림처럼 아까 만든 리포지터리를 선택하면 됩니다.
이제 블로그에 Utterances 댓글 창을 달 준비는 다 됐는데요.
이제 코드를 살펴보겠습니다.
React 코드에 Utterances를 넣을 방법은 Utterances Github Issues에도 올라왔는데요.
가장 완벽한 방법이 마지막에 있습니다.
https://github.com/utterance/utterances/issues/161
일단 Utterances 컴포넌트를 따로 만들겠습니다.
import * as React from 'react'
import { useTheme } from '~/utils/theme'

const Utterances: React.FC = () => {
  const [theme] = useTheme()

  const utterances_theme = theme === 'dark' ? 'github-dark' : 'github-light'

  return (
    <section
      ref={elem => {
        if (!elem) {
          return
        }
        const scriptElem = document.createElement('script')
        scriptElem.src = 'https://utteranc.es/client.js'
        scriptElem.async = true
        scriptElem.setAttribute('repo', 'cpro95/utterances_mycodings_fly_dev')
        scriptElem.setAttribute('issue-term', 'pathname')
        scriptElem.setAttribute('theme', utterances_theme)
        scriptElem.setAttribute('label', 'blog-comment')
        scriptElem.crossOrigin = 'anonymous'
        elem.replaceChildren(scriptElem)
      }}
    />
  )
}

export default Utterances
제 코드를 보시면 아시겠지만 저는 Theme을 이용합니다.
TailwindCSS를 이용한 Dark 모드와 Light 모드인데요.
그래서 제 블로그 시스템에 있는 useTheme 훅을 이용해서 해당 테마에 따른 theme을 바꿔 주고 있습니다.
없으시면 그냥 theme 부분을 ‘github-dark’나 ‘github-light’ 둘 중에서 선택하시면 됩니다
그리고 issue-term을 pathname으로 했는데요.
pathname과 title 둘 중에서 선택할 수 있습니다.
이제 블로그 slug 파일에 위 컴포넌트를 삽입하도록 하겠습니다
import * as React from 'react'
import type {
  HeadersFunction,
  LinksFunction,
  LoaderFunction,
  MetaFunction,
} from '@remix-run/server-runtime'
import { json } from '@remix-run/server-runtime'
import { useLoaderData } from '@remix-run/react'
import { getMDXComponent } from 'mdx-bundler/client'
import invariant from 'tiny-invariant'
import { getMdxPage } from '~/utils/mdx.server'
import type { MdxComponent } from '~/types'

import styles from 'highlight.js/styles/night-owl.css'
import { getSeoMeta } from '~/utils/seo'
import Utterances from '~/components/utterances'

export const meta: MetaFunction = ({ data }: { data: MdxComponent }) => {
  const { keywords = [] } = data.frontmatter.meta ?? {}
  const seoMeta = getSeoMeta({
    title: data.title,
    description: data.description,
    twitter: {
      description: data.description,
      title: data.title,
    },
  })

  return { ...seoMeta, keywords: keywords.join(', ') }
}

export const links: LinksFunction = () => [{ rel: 'stylesheet', href: styles }]

export const headers: HeadersFunction = ({ loaderHeaders }) => {
  return {
    'cache-control':
      loaderHeaders.get('cache-control') ?? 'private, max-age=60',
    Vary: 'Cookie',
  }
}

export const loader: LoaderFunction = async ({ params }) => {
  const slug = params.slug
  invariant(typeof slug === 'string', 'Slug should be a string, and defined')

  const mdxPage = await getMdxPage({ contentDirectory: 'blog', slug })

  if (!mdxPage) {
    throw json(null, { status: 404 })
  }

  return json<MdxComponent>(mdxPage, {
    headers: { 'cache-control': 'private, max-age: 60', Vary: 'Cookie' },
  })
}

export default function Blog() {
  const data = useLoaderData<MdxComponent>()

  const Component = React.useMemo(() => getMDXComponent(data.code), [data])

  return (
    <>
      <article className='prose prose-zinc mx-auto min-h-screen max-w-4xl pt-24 dark:prose-invert lg:prose-lg'>
        <Component />
        <Utterances />
      </article>
    </>
  )
}
별거 없습니다.
그냥 맨 마지막에 <Utterances /> 컴포넌트만 추가한 겁니다.
Utterance.tsx 파일에서 보시면 마지막에 있는 코드를 유심히 살펴보실 필요가 있는데요.
원래는 아래와 같은 코드였습니다.
return (
    <section
      ref={elem => {
        if (!elem) {
          return
        }
        const scriptElem = document.createElement('script')
        ...
        ...
        ...
        scriptElem.crossOrigin = 'anonymous'
        elem.appendChild(scriptElem)
      }}
    />
  )
즉, elem.appendChild 명령어를 썼는데요.
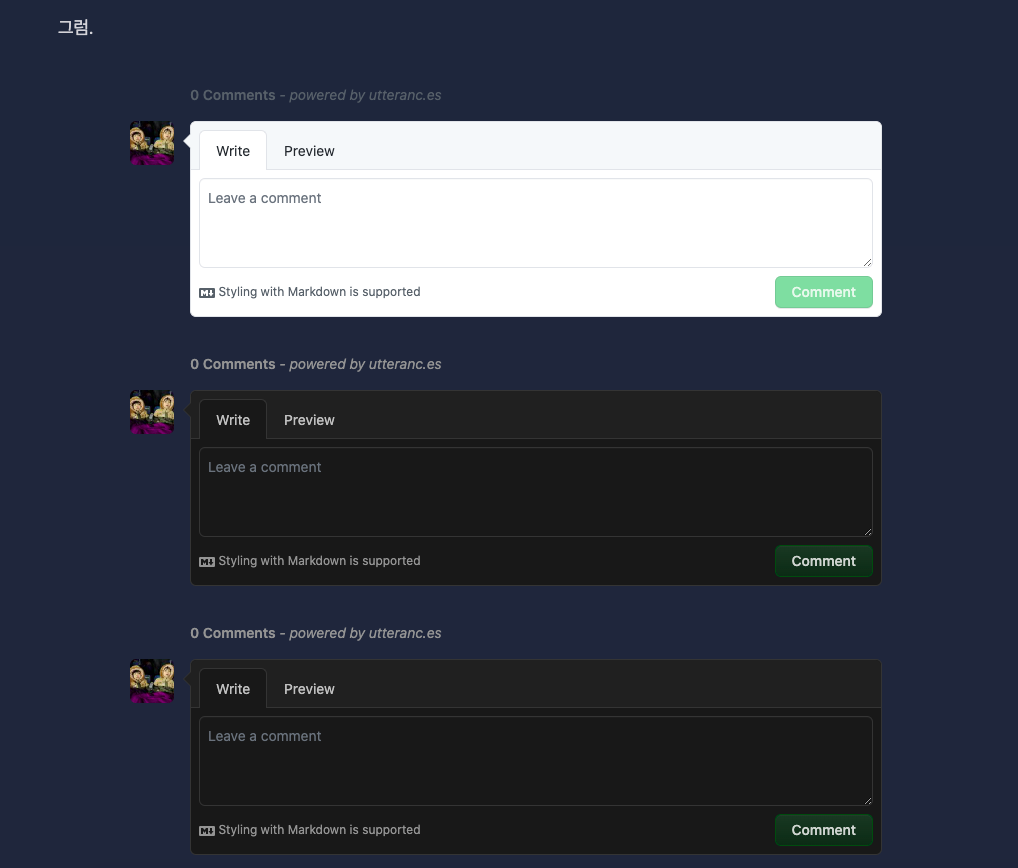
블로그 테마가 다크 모드 체인저가 있다면 위와 같이 appendChild 명령어를 쓰면 테마 변경 시 Utterance 댓글창이 여러 개가 보이는 현상이 나타납니다.
원래는 아래 그림처럼 되어 있던 댓글창이
appendChild 명령어를 쓰면 바로 아래 그림처럼 테마 변경 시 댓글창이 여러 개가 나오는 에러가 발생합니다.
왜냐하면 utterances Element를 계속 Append 하기 때문에 그렇습니다.
테마 변경은 화면이 새로고침이 되지 않고 클라이언트 상에서만 바뀌기 때문입니다.
그래서 실제로 Github Issues에서도 보시면 replaceChildren 명령어로 수정해서 쓰라고 하는 게 해당 이슈의 마지막 댓글일 정도로 가장 정확한 방법입니다.
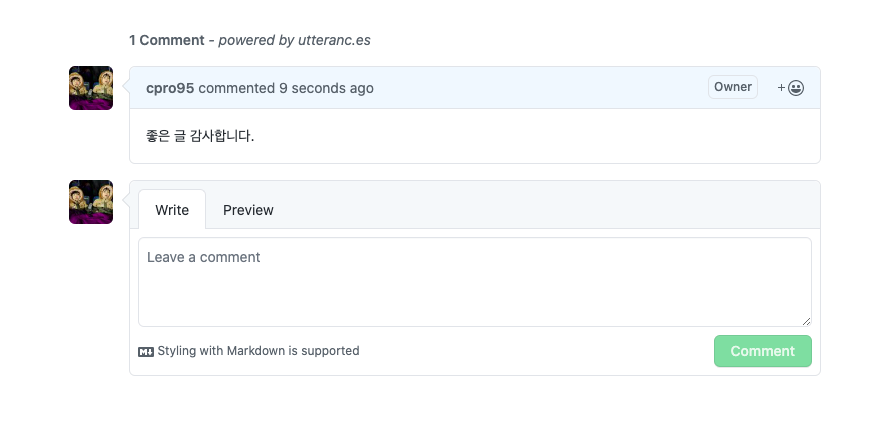
이제 댓들을 한번 써볼까요?
위 그림처럼 댓글을 입력하면 제대로 작동합니다.
그리고 Utterances 댓글을 위해 만들었던 Github Repo로 한번 가볼까요?
어떤가요?
Github Repo를 이용해서 댓글을 저장하고 있습니다.
이제 Utterances 댓글 시스템이 완성되었습니다.
그럼.