Title here
Summary here
June 29, 202415 minutes
안녕하세요!
리액트 네이티브 강좌 8편입니다.
편의를 위해 전체 강좌 링크도 넣었습니다.
리액트 네이티브 강좌. 7편 - 동적인 사용자 인터페이스 구현하기 - Dimensions API와 플랫폼별 코드 작성법
리액트 네이티브 강좌. 9편 - Input and Forms with Switch, KeyboardAvoidingView, Form Validation
리액트 네이티브 강좌. 10편 - Networking 다루기, 데이터 fetching, loading state, error handling
** 목 차 **
리스트(List) 렌더링은 모바일 애플리케이션 개발에서 중요한 부분입니다.
연락처, 제품 또는 다른 여러 항목들의 컬렉션 등 리스트(List)는 기본적인 UI 구성 요소입니다.
이번에는 React Native에서 리스트를 렌더링하는 다양한 방법을 다루겠습니다.
우선, 포켓몬 리스트를 나타내는 모의 데이터 세트를 만들어보겠습니다.
각 포켓몬은 ID, 타입, 이름과 같은 속성을 갖습니다.
프로젝트 폴더 내에 data.json 파일을 정의하고, 100개의 포켓몬 리스트를 복사하여 붙여넣겠습니다.
우리의 목표는 이 포켓몬 리스트를 앱 컴포넌트에 렌더링하는 것입니다.
리스트가 스크롤 될 수 있게 하기 위해 일부러 큰 예제를 골라야 해서 100개의 데이터를 넣었습니다.
data.json
[
  { "id": "1", "type": "Grass", "name": "Bulbasaur" },
  { "id": "2", "type": "Grass", "name": "Ivysaur" },
  { "id": "3", "type": "Grass", "name": "Venusaur" },
  { "id": "4", "type": "Fire", "name": "Charmander" },
  { "id": "5", "type": "Fire", "name": "Charmeleon" },
  { "id": "6", "type": "Fire", "name": "Charizard" },
  { "id": "7", "type": "Water", "name": "Squirtle" },
  { "id": "8", "type": "Water", "name": "Wartortle" },
  { "id": "9", "type": "Water", "name": "Blastoise" },
  { "id": "10", "type": "Bug", "name": "Caterpie" },
  { "id": "11", "type": "Bug", "name": "Metapod" },
  { "id": "12", "type": "Bug", "name": "Butterfree" },
  { "id": "13", "type": "Normal", "name": "Pidgey" },
  { "id": "14", "type": "Normal", "name": "Pidgeotto" },
  { "id": "15", "type": "Normal", "name": "Pidgeot" },
  { "id": "16", "type": "Electric", "name": "Pikachu" },
  { "id": "17", "type": "Electric", "name": "Raichu" },
  { "id": "18", "type": "Ground", "name": "Sandshrew" },
  { "id": "19", "type": "Ground", "name": "Sandslash" },
  { "id": "20", "type": "Poison", "name": "Nidoran" },
  { "id": "21", "type": "Poison", "name": "Nidorina" },
  { "id": "22", "type": "Poison", "name": "Nidoqueen" },
  { "id": "23", "type": "Poison", "name": "Nidorino" },
  { "id": "24", "type": "Poison", "name": "Nidoking" },
  { "id": "25", "type": "Electric", "name": "Voltorb" },
  { "id": "26", "type": "Electric", "name": "Electrode" },
  { "id": "27", "type": "Ground", "name": "Diglett" },
  { "id": "28", "type": "Ground", "name": "Dugtrio" },
  { "id": "29", "type": "Psychic", "name": "Abra" },
  { "id": "30", "type": "Psychic", "name": "Kadabra" },
  { "id": "31", "type": "Psychic", "name": "Alakazam" },
  { "id": "32", "type": "Fighting", "name": "Machop" },
  { "id": "33", "type": "Fighting", "name": "Machoke" },
  { "id": "34", "type": "Fighting", "name": "Machamp" },
  { "id": "35", "type": "Ice", "name": "Jynx" },
  { "id": "36", "type": "Ice", "name": "Lapras" },
  { "id": "37", "type": "Ghost", "name": "Gastly" },
  { "id": "38", "type": "Ghost", "name": "Haunter" },
  { "id": "39", "type": "Ghost", "name": "Gengar" },
  { "id": "40", "type": "Rock", "name": "Geodude" },
  { "id": "41", "type": "Rock", "name": "Graveler" },
  { "id": "42", "type": "Rock", "name": "Golem" },
  { "id": "43", "type": "Water", "name": "Horsea" },
  { "id": "44", "type": "Water", "name": "Seadra" },
  { "id": "45", "type": "Grass", "name": "Oddish" },
  { "id": "46", "type": "Grass", "name": "Gloom" },
  { "id": "47", "type": "Grass", "name": "Vileplume" },
  { "id": "48", "type": "Normal", "name": "Meowth" },
  { "id": "49", "type": "Normal", "name": "Persian" },
  { "id": "50", "type": "Fire", "name": "Growlithe" },
  { "id": "51", "type": "Fire", "name": "Arcanine" },
  { "id": "52", "type": "Water", "name": "Poliwag" },
  { "id": "53", "type": "Water", "name": "Poliwhirl" },
  { "id": "54", "type": "Water", "name": "Poliwrath" },
  { "id": "55", "type": "Psychic", "name": "Kadabra" },
  { "id": "56", "type": "Psychic", "name": "Alakazam" },
  { "id": "57", "type": "Fighting", "name": "Machop" },
  { "id": "58", "type": "Fighting", "name": "Machoke" },
  { "id": "59", "type": "Fighting", "name": "Machamp" },
  { "id": "60", "type": "Ice", "name": "Jynx" },
  { "id": "61", "type": "Ice", "name": "Lapras" },
  { "id": "62", "type": "Ghost", "name": "Gastly" },
  { "id": "63", "type": "Ghost", "name": "Haunter" },
  { "id": "64", "type": "Ghost", "name": "Gengar" },
  { "id": "65", "type": "Rock", "name": "Onix" },
  { "id": "66", "type": "Bug", "name": "Krabby" },
  { "id": "67", "type": "Bug", "name": "Kingler" },
  { "id": "68", "type": "Normal", "name": "Rattata" },
  { "id": "69", "type": "Normal", "name": "Raticate" },
  { "id": "70", "type": "Flying", "name": "Spearow" },
  { "id": "71", "type": "Flying", "name": "Fearow" },
  { "id": "72", "type": "Electric", "name": "Magnemite" },
  { "id": "73", "type": "Electric", "name": "Magneton" },
  { "id": "74", "type": "Ground", "name": "Cubone" },
  { "id": "75", "type": "Ground", "name": "Marowak" },
  { "id": "76", "type": "Poison", "name": "Zubat" },
  { "id": "77", "type": "Poison", "name": "Golbat" },
  { "id": "78", "type": "Fire", "name": "Vulpix" },
  { "id": "79", "type": "Fire", "name": "Ninetales" },
  { "id": "80", "type": "Water", "name": "Jigglypuff" },
  { "id": "81", "type": "Water", "name": "Wigglytuff" },
  { "id": "82", "type": "Grass", "name": "Zubat" },
  { "id": "83", "type": "Grass", "name": "Golbat" },
  { "id": "84", "type": "Normal", "name": "Ekans" },
  { "id": "85", "type": "Normal", "name": "Arbok" },
  { "id": "86", "type": "Fire", "name": "Pikachu" },
  { "id": "87", "type": "Fire", "name": "Raichu" },
  { "id": "88", "type": "Water", "name": "Dratini" },
  { "id": "89", "type": "Water", "name": "Dragonair" },
  { "id": "90", "type": "Dragon", "name": "Dragonite" },
  { "id": "91", "type": "Fairy", "name": "Clefairy" },
  { "id": "92", "type": "Fairy", "name": "Clefable" },
  { "id": "93", "type": "Ice", "name": "Seel" },
  { "id": "94", "type": "Ice", "name": "Dewgong" },
  { "id": "95", "type": "Psychic", "name": "Grimer" },
  { "id": "96", "type": "Psychic", "name": "Muk" },
  { "id": "97", "type": "Fighting", "name": "Shellder" },
  { "id": "98", "type": "Fighting", "name": "Cloyster" },
  { "id": "99", "type": "Flying", "name": "Gastly" },
  { "id": "100", "type": "Flying", "name": "Haunter" }
]
그리고 다음과 같이 해당 data.json 파일을 import 합니다.
import PokemonList from './data.json';이제 데이터가 준비되었으니, React Native에서 리스트를 어떻게 렌더링할지 알아보겠습니다.
React에 익숙하다면, map 메서드가 리스트를 렌더링하는 일반적인 방법이라는 것을 알고 있을 것입니다.
React Native에서도 동일한 접근법을 사용할 수 있습니다.
뷰 컨테이너 내에서 중괄호를 사용하여 pokemonList.map을 호출하고, 각 포켓몬에 대해 뷰 컴포넌트를 반환합니다.
이 컴포넌트는 포켓몬 타입과 이름을 렌더링합니다.
뷰 컴포넌트에 key 속성을 Pokemon.id로 지정합니다. 이 key 속성은 React가 리스트를 효율적으로 업데이트하는 데 필요하며, 각 항목에 대해 고유한 값이어야 합니다.
import PokemonList from './data.json';
import { View, Text, StyleSheet } from 'react-native';

export default function App() {
  return (<View style={styles.container}>
      {PokemonList.map(pokemon => (
        <View key={pokemon.id}>
          <Text>{pokemon.name}</Text>
          <Text>{pokemon.type}</Text>
        </View>
      ))}
      </View>
  );
}

const styles = StyleSheet.create({
  container: {
    flex: 1,
    backgroundColor: '#fff',
    alignItems: 'center',
    justifyContent: 'center',
  }
});
파일을 저장하고 디바이스에서 확인해보면 포켓몬 리스트가 렌더링되는 것을 볼 수 있습니다.
그러나 스크롤이 되지 않아 리스트의 맨 아래로 이동할 수 없습니다.
이를 해결하기 위해 ScrollView, SafeAreaView를 추가해보겠습니다.
뷰 컨테이너 내에 ScrollView를 추가합니다.
UI를 확인해보면 리스트가 스크롤 가능해졌지만, 여전히 보기 좋지 않습니다.
import PokemonList from './data.json';
import { ScrollView, SafeAreaView, View, Text, StyleSheet } from 'react-native';

export default function App() {
  return (<SafeAreaView style={styles.container}>
  <ScrollView>
      {PokemonList.map(pokemon => (
        <View key={pokemon.id}>
          <Text>{pokemon.name}</Text>
          <Text>{pokemon.type}</Text>
        </View>
      ))}
      </ScrollView>
      </SafeAreaView>
  );
}

const styles = StyleSheet.create({
  container: {
    flex: 1,
    backgroundColor: '#fff',
    alignItems: 'center',
    justifyContent: 'center',
  }
});
스타일링을 개선해보겠습니다.
먼저, StatusBar를 불러옵니다.
컨테이너에 패딩 탑을 StatusBar.currentHeight로 설정하고, 배경색을 #F5F5F5로 변경하고 alignItems와 justifyContent를 제거합니다.
그리고 scrollView 와 card, cardText 스타일을 추가합니다.
import PokemonList from './data.json';
import { ScrollView, SafeAreaView, View, Text, StyleSheet, StatusBar } from 'react-native';
export default function App() {
return (<SafeAreaView style={styles.container}>
<ScrollView style={styles.scrollView}>
{PokemonList.map(pokemon => (
<View style={styles.card} key={pokemon.id}>
<Text style={styles.cardText}>{pokemon.name}</Text>
<Text style={styles.cardText}>{pokemon.type}</Text>
</View>
))}
</ScrollView>
</SafeAreaView>
);
}
const styles = StyleSheet.create({
container: {
flex: 1,
backgroundColor: '#F5F5F5',
paddingTop: StatusBar.currentHeight,
},
scrollView: {
paddingHorizontal: 16,
},
card: {
backgroundColor: "white",
padding: 16,
borderRadius: 8,
borderWidth: 1,
marginBottom: 16,
},
cardText: {
fontSize: 30,
}
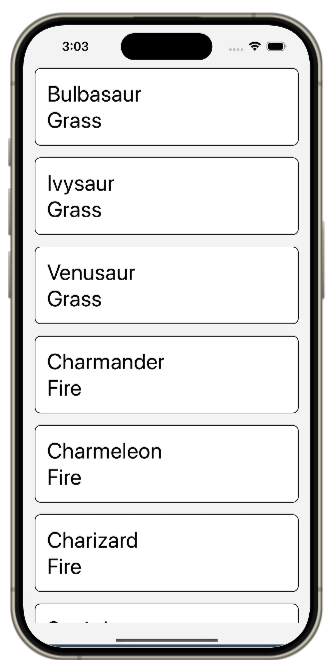
});이제 리스트가 더 보기 좋게 렌더링됩니다.
하지만 ScrollView 컴포넌트와 map 메서드를 사용하여 리스트를 렌더링하는 것은 권장되는 방법이 아닙니다.
지난번에 우리는 ScrollView 컴포넌트와 map 메서드를 사용해 React Native에서 리스트를 렌더링하는 방법을 배웠습니다.
그러나 이 방법은 뷰포트에 있지 않은 항목들도 모두 렌더링합니다.
이를 시연해 보겠습니다.
map 메서드 내에서 포켓몬 ID를 로그로 출력해 보겠습니다.
<SafeAreaView style={styles.container}>
  <ScrollView style={styles.scrollView}>
    {PokemonList.map((pokemon) => {
      console.log(pokemon.id);
      return (
        <View style={styles.card} key={pokemon.id}>
          <Text style={styles.cardText}>{pokemon.name}</Text>
          <Text style={styles.cardText}>{pokemon.type}</Text>
        </View>
      );
    })}
  </ScrollView>
</SafeAreaView>
콘솔창을 보면 아래와 같이 나옵니다.
``bash LOG 88 LOG 89 LOG 90 LOG 91 LOG 92 LOG 93 LOG 94 LOG 95 LOG 96 LOG 97 LOG 98 LOG 99 LOG 100
무조건 모든 아이템이 다 로드되고 있습니다.

작은 리스트에서는 모든 항목을 렌더링하는 것이 문제가 되지 않을 수 있지만, 수천 개의 항목으로 구성된 큰 데이터 세트에서는 성능 문제가 발생할 수 있습니다.

React Native에서 리스트를 렌더링하는 권장 접근 방식은 FlatList 컴포넌트를 사용하는 것입니다.

FlatList는 현재 뷰에 있는 항목들만 렌더링하여 긴 리스트에서도 높은 성능을 보장합니다.

### FlatList 사용하기

1. ScrollView 컴포넌트 코드를 주석 처리합니다.
2. React Native에서 FlatList 컴포넌트를 가져옵니다.

```javascript
import { FlatList } from 'react-native';data와 renderItem. <SafeAreaView style={styles.container}>
{/* <ScrollView style={styles.scrollView}>
{PokemonList.map((pokemon) => {
console.log(pokemon.id);
return (
<View style={styles.card} key={pokemon.id}>
<Text style={styles.cardText}>{pokemon.name}</Text>
<Text style={styles.cardText}>{pokemon.type}</Text>
</View>
);
})}
</ScrollView> */}
<FlatList
data={PokemonList}
renderItem={({ item }) => {
return (
<View style={styles.card} key={item.id}>
<Text style={styles.cardText}>{item.name}</Text>
<Text style={styles.cardText}>{item.type}</Text>
</View>
);
}}
/>
</SafeAreaView>이제 UI를 확인해보면 여전히 리스트를 볼 수 있고, 아래로 스크롤할 수 있습니다.
그러나 이 리스트는 성능이 더 좋습니다.
이를 확인하기 위해 renderItem 함수 내에서 항목 ID를 콘솔에 로그로 출력해 보겠습니다.
<FlatList
  data={PokemonList}
  renderItem={({ item }) => {
    console.log(item.id);
    return (
      <View style={styles.card} key={item.id}>
        <Text style={styles.cardText}>{item.name}</Text>
        <Text style={styles.cardText}>{item.type}</Text>
      </View>
    );
  }}
/>
이제 터미널을 보면 처음 69개의 ID만 로그로 출력된 것을 볼 수 있습니다.
 LOG  57
 LOG  58
 LOG  59
 LOG  60
 LOG  61
 LOG  62
 LOG  63
 LOG  64
 LOG  65
 LOG  66
 LOG  67
 LOG  68
 LOG  69
이는 FlatList가 원활한 스크롤을 보장하기 위해 몇 개의 디바이스 길이의 콘텐츠를 미리 생성하기 때문입니다.
이제 화면을 스크롤 하면 LOG 숫자가 올라가는 걸 볼 수 있을 겁니다.
FlatList에서 한 가지 속성을 더 강조하고 싶습니다.
그 속성은 keyExtractor입니다.
이 속성은 데이터 배열에서 항목을 받아 그 항목에 대한 고유 키를 반환하는 함수입니다.
이를 통해 React Native는 리스트의 항목을 효율적으로 관리하고 업데이트할 수 있습니다.
keyExtractor는 각 항목에 고유한 키를 제공하므로, 명시적으로 설정하는 것이 좋습니다.
만약 keyExtractor를 설정하지 않으면, FlatList는 기본적으로 배열의 인덱스를 키로 사용합니다.
하지만, 인덱스를 사용하는 것은 리스트의 항목이 재정렬되거나 변경될 때 비효율적일 수 있습니다.
따라서, 가능한 경우 고유한 식별자를 사용해 keyExtractor를 설정하는 것이 권장됩니다.
data.json 파일에서 볼 수 있듯이 우리는 각 항목을 id로 관리하기 때문에 아래와 같이 하면 됩니다.
keyExtractor={item => item.id.toString()}<View style={styles.scrollView}>
<FlatList
data={PokemonList}
renderItem={renderItem}
keyExtractor={item => item.id.toString()}
/>
</View>이제 포켓몬 리스트가 훨씬 더 잘 보일 것입니다.
ScrollView는 React 자식 컴포넌트를 한 번에 모두 렌더링할 수 있지만 성능상의 단점이 있습니다.
반면, FlatList는 항목이 나타날 때 렌더링하고 화면에서 벗어난 항목은 제거하여 메모리와 처리 시간을 절약합니다.
긴 리스트를 렌더링할 때는 FlatList를 사용하는 것이 권장됩니다.
이번에는 ItemSeparatorComponent 속성을 알아보겠습니다.
이 속성은 리스트의 각 항목 사이에 렌더링되는 React 컴포넌트를 받습니다.
하지만 리스트의 최상단과 최하단에는 적용되지 않습니다.
우리의 경우, 카드 컴포넌트의 하단 마진을 대체하기에 완벽한 속성입니다.
현재 카드 컴포넌트의 하단 마진 16픽셀은 카드 간의 유용한 구분자로 작용하지만, 리스트의 하단에도 불필요한 여백을 추가합니다.
ItemSeparatorComponent 속성을 사용해 16픽셀 높이의 뷰 컴포넌트를 지정하고, 카드 컴포넌트의 하단 마진을 주석 처리해보겠습니다.
import PokemonList from "./data.json";
import {
  SafeAreaView,
  View,
  Text,
  FlatList,
  StyleSheet,
  StatusBar,
} from "react-native";

const renderItem = ({ item }) => (
  <View style={styles.card}>
    <Text style={styles.cardText}>{item.name}</Text>
    <Text style={styles.cardText}>{item.type}</Text>
  </View>
);

export default function App() {
  return (
    <SafeAreaView style={styles.container}>
      <FlatList
        data={PokemonList}
        renderItem={renderItem}
        keyExtractor={(item) => item.id.toString()}
      />
    </SafeAreaView>
  );
}

const styles = StyleSheet.create({
  container: {
    flex: 1,
    backgroundColor: "#F5F5F5",
    paddingTop: StatusBar.currentHeight,
  },
  scrollView: {
    paddingHorizontal: 16,
  },
  card: {
    backgroundColor: "white",
    padding: 16,
    borderRadius: 8,
    borderWidth: 1,
    // marginBottom: 16,
  },
  cardText: {
    fontSize: 30,
  },
});
일단 위와 같이 하면 아래 그림과 같이 나옵니다.
이제 ItemSeparatorComponent을 이용해 보겠습니다.
const renderItem = ({ item }) => (
  <View style={styles.card}>
    <Text style={styles.cardText}>{item.name}</Text>
    <Text style={styles.cardText}>{item.type}</Text>
  </View>
);

const ItemSeparator = () => <View style={{ height: 16 }} />;

export default function App() {
  return (
    <SafeAreaView style={styles.container}>
      <FlatList
        data={PokemonList}
        renderItem={renderItem}
        keyExtractor={(item) => item.id.toString()}
        ItemSeparatorComponent={ItemSeparator}
      />
    </SafeAreaView>
  );
}
실행결과는 아래와 같습니다.
ItemSeparatorComponent 속성은 리스트의 각 항목 사이에 컴포넌트를 렌더링합니다.ItemSeparatorComponent를 사용하면 리스트 하단의 불필요한 여백을 제거할 수 있습니다.ItemSeparatorComponent는 React 컴포넌트나 React 컴포넌트를 반환하는 함수를 받을 수 있으며, 특정 속성을 받아 더 정교한 스타일링이 가능합니다.이제 ItemSeparatorComponent를 사용하여 리스트 항목 간의 간격을 더 우아하게 조정할 수 있습니다.
이번에는 FlatList의 ListEmptyComponent 속성에 대해 알아보겠습니다.
이 속성은 리스트가 비어 있을 때 렌더링할 React 컴포넌트를 받습니다.
예를 들어, “항목이 없습니다"라는 간단한 텍스트 컴포넌트를 지정해보겠습니다.
다음은 ListEmptyComponent 속성을 사용하는 방법입니다:
export default function App() {
  return (
    <SafeAreaView style={styles.container}>
      <FlatList
        data={[]}
        renderItem={renderItem}
        keyExtractor={(item) => item.id.toString()}
        ItemSeparatorComponent={ItemSeparator}
        ListEmptyComponent={<Text>항목이 없습니다</Text>}
      />
    </SafeAreaView>
  );
}
위와 같이 data 부분에 빈 배열을 넣었고, 그리고 ListEmptyComponent에 간단한 Text 컴포넌트로 감싼 텍스트를 넣어주면 됩니다.
실제로는 유저에게 좀 더 명확한 에러 이유를 보여주기 위해 “항목이 없습니다” 내용을 화면 중앙에 표시하고 좀 더 굵은 폰트로 표시하는게 좋습니다.
실제로 styles를 추가해 보십시요.
ListEmptyComponent 속성은 리스트가 비어 있을 때 표시할 컴포넌트를 지정합니다.ListEmptyComponent에 지정한 컴포넌트가 렌더링됩니다.이번에는 FlatList 컴포넌트에서 지원하는 두 가지 속성인 ListHeaderComponent와 ListFooterComponent에 대해 알아보겠습니다.
이 속성들은 리스트에 사용자 정의 헤더(Header) 및 푸터(Footer) 컴포넌트를 추가할 수 있게 해줍니다.
ListHeaderComponent 속성은 React 컴포넌트를 받아 리스트 상단에 렌더링합니다.
이를 통해 제목, 설명 또는 리스트 항목 위에 표시하고자 하는 다른 콘텐츠를 추가할 수 있습니다.
간단한 텍스트 컴포넌트를 추가해보겠습니다.
<FlatList
  data={PokemonList}
  renderItem={renderItem}
  keyExtractor={(item) => item.id.toString()}
  ItemSeparatorComponent={ItemSeparator}
  ListEmptyComponent={<Text>항목이 없습니다</Text>}
  ListHeaderComponent={<Text style={styles.headerText}>Pokemon List</Text>}
/>
그리고 styles.headerText 부분은 아래와 같시 작성합니다.
headerText: {
fontSize: 24,
textAlign: "center",
marginBottom: 12,
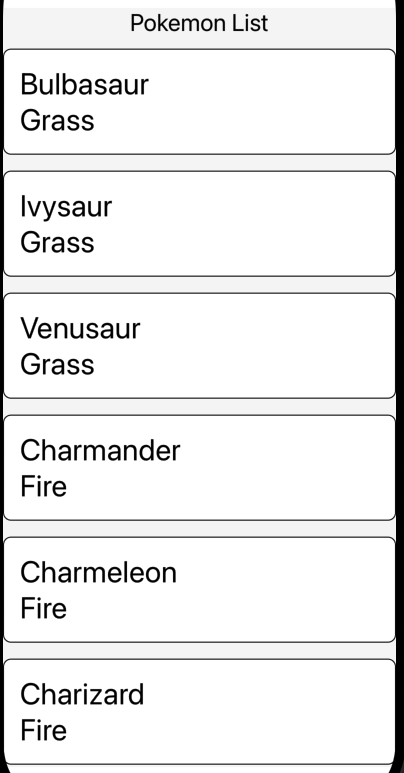
},이제 아래와 같이 나올겁니다.
ListFooterComponent 속성은 React 컴포넌트를 받아 리스트 하단에 렌더링합니다.
이를 통해 각주, 페이지네이션 컨트롤 또는 리스트의 끝을 나타내는 메시지를 추가할 수 있습니다.
간단한 텍스트 컴포넌트를 추가해보겠습니다.
다음은 ListHeaderComponent와 ListFooterComponent 속성을 사용하는 방법입니다:
ListHeaderComponent와 ListFooterComponent 속성을 추가합니다.<FlatList
data={PokemonList}
renderItem={renderItem}
keyExtractor={(item) => item.id.toString()}
ItemSeparatorComponent={ItemSeparator}
ListEmptyComponent={<Text>항목이 없습니다</Text>}
ListHeaderComponent={
<Text style={styles.headerText}>Pokemon List</Text>
}
ListFooterComponent={<Text style={styles.footerText}>End of List</Text>}
/>스타일도 headerText와 같이 아래와 같이 작성합니다.
  footerText: {
    fontSize: 24,
    textAlign: "center",
    marginBottom: 12,
  },
이제 에뮬레이터에서 화면을 맨 끝까지 스크로하면 아래 그림과 같이 ListFooterComponent의 내용이 나올겁니다.
ListHeaderComponent 속성은 리스트 상단에 렌더링할 컴포넌트를 지정합니다.ListFooterComponent 속성은 리스트 하단에 렌더링할 컴포넌트를 지정합니다.이제 ListHeaderComponent와 ListFooterComponent를 활용하여 더 나은 사용자 경험을 제공할 수 있습니다.
이번에는 React Native의 SectionList 컴포넌트를 알아보겠습니다.
SectionList는 섹션별 리스트를 렌더링하기 위해 설계된 성능 좋은 컴포넌트입니다.
예제로 타입별로 분류된 포켓몬 리스트를 렌더링할 것입니다.
불 타입 포켓몬 섹션, 물 타입 포켓몬 섹션 등으로 나눠보겠습니다.
먼저 타입별 포켓몬 리스트를 나타내는 모의 데이터 세트를 만듭니다.
프로젝트 폴더 내에 groupedData.json 파일을 생성하고 JSON 데이터를 붙여넣습니다.
이 데이터는 네 개의 객체 배열로 구성되며, 각 객체는 두 개의 키-값 쌍을 포함합니다:
포켓몬 타입을 나타내는 type과 해당 타입의 포켓몬 리스트를 나타내는 data입니다.
data 속성명을 사용하는 것이 중요합니다.
이는 SectionList 컴포넌트가 기대하는 속성명이기 때문입니다.
grouped-data.json
[
  {
    "type": "Grass",
    "data": ["Bulbasaur", "Ivysaur", "Venusaur"]
  },
  {
    "type": "Fire",
    "data": ["Charmander", "Charmeleon", "Charizard"]
  },
  {
    "type": "Water",
    "data": ["Squirtle", "Wartortle", "Blastoise"]
  },
  { "type": "Electric", "data": ["Pikachu", "Raichu"] }
]이제 SectionList 컴포넌트를 사용하여 데이터를 표시해보겠습니다.
groupedData.json 파일에서 가져옵니다.export default function App() {
return (
<SafeAreaView style={styles.container}>
{/* <FlatList
data={PokemonList}
renderItem={renderItem}
keyExtractor={(item) => item.id.toString()}
ItemSeparatorComponent={ItemSeparator}
ListEmptyComponent={<Text>항목이 없습니다</Text>}
ListHeaderComponent={
<Text style={styles.headerText}>Pokemon List</Text>
}
ListFooterComponent={<Text style={styles.footerText}>End of List</Text>}
/> */}
<View style={styles.scrollView}>
<SectionList
sections={groupedPokemonList}
renderItem={({ item }) => {
return (
<View style={styles.card}>
<Text style={styles.cardText}>{item}</Text>
</View>
);
}}
/>
</View>
</SafeAreaView>
);
}위와 같이 SectionList 컴포넌트를 만듭니다.
renderItem에 일반적인 item을 넣어서 groupedPokemonList의 data 항목에 있는게 나열됩니다.
아래와 같이 나옵니다.
하지만 우리가 원하는 Pokemon 타입이 안나옵니다.
이제 renderSectionHeader 속성을 추가해 봅시다.
<View style={styles.scrollView}>
  <SectionList
    sections={groupedPokemonList}
    renderItem={({ item }) => {
      return (
        <View style={styles.card}>
          <Text style={styles.cardText}>{item}</Text>
        </View>
      );
    }}
    renderSectionHeader={({ section }) => (
      <Text style={styles.sectionHeaderText}>{section.type}</Text>
    )}
  />
</View>
그리고 sectionHeaderText 스타일도 아래와 같이 추가합니다.
sectionHeaderText: {
  backgroundColor: "white",
  fontSize: 24,
  fontWeight: "bold",
},
이제 실행결과를 봅시다.
위와 같이 섹션의 타입까지 나옵니다.
SectionList에는 FlatList의 ItemSeparatorComponent를 추가할 수 있는데요.
주석처리되었던 FlatList에서 ItemSeparatorComponent 부분을 복사해서 넣읍시다.
단 콜백형태로 넣어야 합니다.
<View style={styles.scrollView}>
  <SectionList
    sections={groupedPokemonList}
    renderItem={({ item }) => {
      return (
        <View style={styles.card}>
          <Text style={styles.cardText}>{item}</Text>
        </View>
      );
    }}
    renderSectionHeader={({ section }) => (
      <Text style={styles.sectionHeaderText}>{section.type}</Text>
    )}
    ItemSeparatorComponent={() => <View style={{ height: 16 }} />}
  />
</View>
이제 조금 보기 좋아졌습니다.
그런데 섹션 타입이 있는 부분이 조금 거슬립니다.
ItemSeparatorComponent과 비슷한 SectionSeparatorComponent가 있습니다.
다음과 같이 하면 됩니다.
<SectionList
  sections={groupedPokemonList}
  renderItem={({ item }) => {
    return (
      <View style={styles.card}>
        <Text style={styles.cardText}>{item}</Text>
      </View>
    );
  }}
  renderSectionHeader={({ section }) => (
    <Text style={styles.sectionHeaderText}>{section.type}</Text>
  )}
  ItemSeparatorComponent={() => <View style={{ height: 16 }} />}
  SectionSeparatorComponent={() => <View style={{ height: 16 }} />}
/>
위와 같이 UI가 완성되었습니다.
그리고 ListEmptyComponent도 똑같으니까 아래와 같이 작성하면 됩니다.
<SectionList
  sections={[]}
  renderItem={({ item }) => {
    return (
      <View style={styles.card}>
        <Text style={styles.cardText}>{item}</Text>
      </View>
    );
  }}
  renderSectionHeader={({ section }) => (
    <Text style={styles.sectionHeaderText}>{section.type}</Text>
  )}
  ItemSeparatorComponent={() => <View style={{ height: 16 }} />}
  SectionSeparatorComponent={() => <View style={{ height: 16 }} />}
  ListEmptyComponent={<Text>항목이 없습니다</Text>}
/>SectionList 컴포넌트는 섹션별로 데이터를 렌더링하는 데 사용됩니다.sections 속성은 섹션 리스트의 데이터 소스로 사용됩니다.renderItem 속성은 각 항목을 렌더링하는 JSX를 반환하는 함수입니다.renderSectionHeader 속성은 각 섹션 헤더를 렌더링하는 JSX를 반환하는 함수입니다.ItemSeparatorComponent와 SectionSeparatorComponent 속성은 항목과 섹션 사이의 구분자를 렌더링하는 데 사용됩니다.ListEmptyComponent 속성은 리스트가 비어 있을 때 렌더링할 컴포넌트를 지정합니다.이렇게 하면 타입별로 분류된 포켓몬 리스트를 섹션별로 깔끔하게 렌더링할 수 있습니다.
지금까지 리스트를 다루는 다양한 방법을 배웠습니다.
Map 메서드와 ScrollView 컴포넌트를 사용한 리스트 렌더링, FlatList 컴포넌트를 통한 성능 개선된 리스트 렌더링, 그리고 SectionList 컴포넌트를 통한 섹션별 데이터 렌더링까지 모두 살펴보았습니다.
그럼.